

Last Updated: October 25, 2026
Quick Summary
To clean bathroom grout with a brush, apply a mild cleaner or baking soda paste, let it sit a few minutes, then scrub in short back-and-forth strokes with a firm nylon grout brush sized to your joint width. Work in small sections, rinse with clean water, and dry right away.
- Choose a grout brush with stiff, dense nylon bristles and a head narrow enough to fit the joint.
- Match the brush to joint width: slim brushes for 1/16 to 1/8 inch lines, fuller heads for wider joints.
- Let cleaner sit a few minutes before scrubbing so dwell time does most of the work.
- Scrub one small section at a time, about a few feet, using firm but steady pressure.
- Clean bathroom grout every one to two weeks and deep clean every one to three months.
Table of Contents
- What You'll Need Before You Start
- Step 1: Choose the Best Brush for Cleaning Grout
- Step 2: Pick a Cleaner That's Safe for Your Tile
- Step 3: Apply Cleaner and Let It Sit
- Step 4: Scrub Grout Lines in Small Sections
- Step 5: Rinse, Dry, and Check Your Work
- How to Remove Stains from Grout
- How Often to Clean Bathroom Grout
- Frequently Asked Questions
What You'll Need Before You Start
Learning how to clean bathroom grout with a brush starts with the right supplies, not the hardest scrub. Grout is porous, so dirt, soap scum, and body oils settle into it and stay there. A quick wipe of the tile does nothing for the lines between them.
Gather these before you begin:
- A grout brush with firm nylon bristles, or a stiff toothbrush for tight spots
- A cleaner safe for your tile type
- Baking soda and water for a paste
- A spray bottle for diluted solution
- A sponge, cloth, and bucket of clean water
- Rubber gloves and eye protection
- A fan or open window for airflow
Nuksy carries practical cleaning tools for jobs like this, and this guide walks through the full process step by step. Below, you'll see exactly how to pick a brush, match a cleaner to your tile, and scrub without damaging the grout.
Step 1: Choose the Best Brush for Cleaning Grout
The best brush for cleaning grout has stiff, dense bristles and a head narrow enough to fit inside the joint. A wide scrub brush glides over the tile and misses the grout line entirely. That is the most common mistake people make.
A grout brush is a small hand brush built for narrow lines. Look for three things:
- Firm nylon bristles that stay stiff when wet
- Dense bristle clusters that reach into the joint
- A compact head sized to the grout width
Match the Brush to Grout Type and Joint Width
Joint width decides the brush more than any other factor. Grout lines typically run from about 1/16 inch on a tight porcelain floor to 1/2 inch on a wide sanded joint, and a brush that fits one will skip over the other.
- Narrow joints (about 1/16 to 1/8 inch): use a slim brush with a single row of bristles, or a toothbrush. A full head will ride on the tile edges and never reach the bottom of the line.
- Standard joints (about 1/8 to 1/4 inch): a compact grout brush with a dense cluster of firm nylon bristles fits cleanly and covers more line per stroke.
- Wide joints (about 1/4 inch and up): a fuller brush head with more bristles speeds up the job, since the head can sit inside the joint instead of on top of it.
Bristle material matters too. Nylon is the default because it stays stiff when wet and does not shed like natural fiber. Avoid metal-bristle brushes on grout: they can scratch tile glaze and gouge soft grout. Stiff nylon is firm enough for cement-based grout without cutting into it.
Grout type changes the pressure and stiffness you want:
- Sanded cement grout has a rough, gritty surface that holds dirt well. A firm nylon brush works into that texture without damaging it.
- Unsanded cement grout is smoother and softer, so use a slightly softer nylon brush and lighter pressure to avoid wearing the surface.
- Epoxy grout is hard and smooth and resists staining, but it can dull or scratch under aggressive abrasion. Use a softer brush and let the cleaner do the work.
- Sealed grout needs a gentle brush so the seal is not scrubbed away. Firm pressure on a sealed line shortens the life of the sealer.
When a Toothbrush Works and When It Doesn't
An old toothbrush is the go-to for grout because it is cheap and fits tight lines.
It falls short on big jobs. A toothbrush has a tiny head and soft bristles, so scrubbing a full shower floor takes far too long and the bristles bend before they lift grime. Use it for detail work, not the main scrub.
For larger floors and shower walls, a powered option saves real effort. The Cordless Electric Spin Scrubber - 8 Brush Heads & Adjustable Handle comes with eight brush heads, so one tool covers grout lines, corners, and tile faces.

Step 2: Pick a Cleaner That's Safe for Your Tile
The safest cleaner for most tile and grout is a mild one: dish soap in warm water, or a baking soda paste. Strong acids and harsh bleaches can eat away grout and dull some tile finishes.
Match the cleaner to the surface:
- Ceramic and porcelain tile: mild soap or baking soda paste
- Natural stone: a pH-neutral cleaner only, since acids etch stone
- Sealed grout: a gentle cleaner that won't strip the seal
Homemade Grout Cleaner: Baking Soda Paste and Diluted Solutions
A homemade grout cleaner is easy to mix and gentle on most surfaces. Two recipes cover most jobs:
- Baking soda paste: mix baking soda with a little water until it forms a thick paste. Apply it to grout lines and let it sit.
- Diluted solution: add a few drops of mild dish soap to warm water in a spray bottle. Use it for light grime and regular upkeep.
For heavier buildup, a mix of baking soda and a small amount of vinegar fizzes and lifts dirt. Watch out: never combine bleach with vinegar or ammonia. That mix releases harmful fumes.
Step 3: Apply Cleaner and Let It Sit
Apply the cleaner along the grout lines and let it sit before you scrub. Dwell time does most of the work. A common mistake is scrubbing right away, which wastes effort and cleaner.
Spray or spread the solution directly on the grout. Give it a few minutes to soften the grime. For a baking soda paste, press it into the lines with your fingers or a cloth.
Cordless Electric Spin Scrubber – 8 Brush Heads & Adjustable Handle →
A brush that dispenses soap as you go makes this step simpler. The Soap Dispensing Cleaning Brush - Refillable Scrub Brush holds cleaning liquid in a built-in reservoir and releases it with a push button, so cleaner goes right where you scrub. The Soap Dispensing Cleaning Brush - Refillable Scrub Brush holds cleaning liquid in a built-in reservoir and releases it with a push button, so cleaner goes right where you scrub.

Step 4: Scrub Grout Lines in Small Sections
Scrub grout lines in small sections, working in short back-and-forth strokes along each line. Small sections keep the cleaner from drying out and let you focus pressure where it counts.
Work one area at a time, about a few feet at a stretch. For technique guidance on using a refillable scrub brush on tile, see How to Use a Refillable Scrub Brush on Tile. Use firm but steady brush pressure. Pressing too hard can wear down grout and damage the surface.
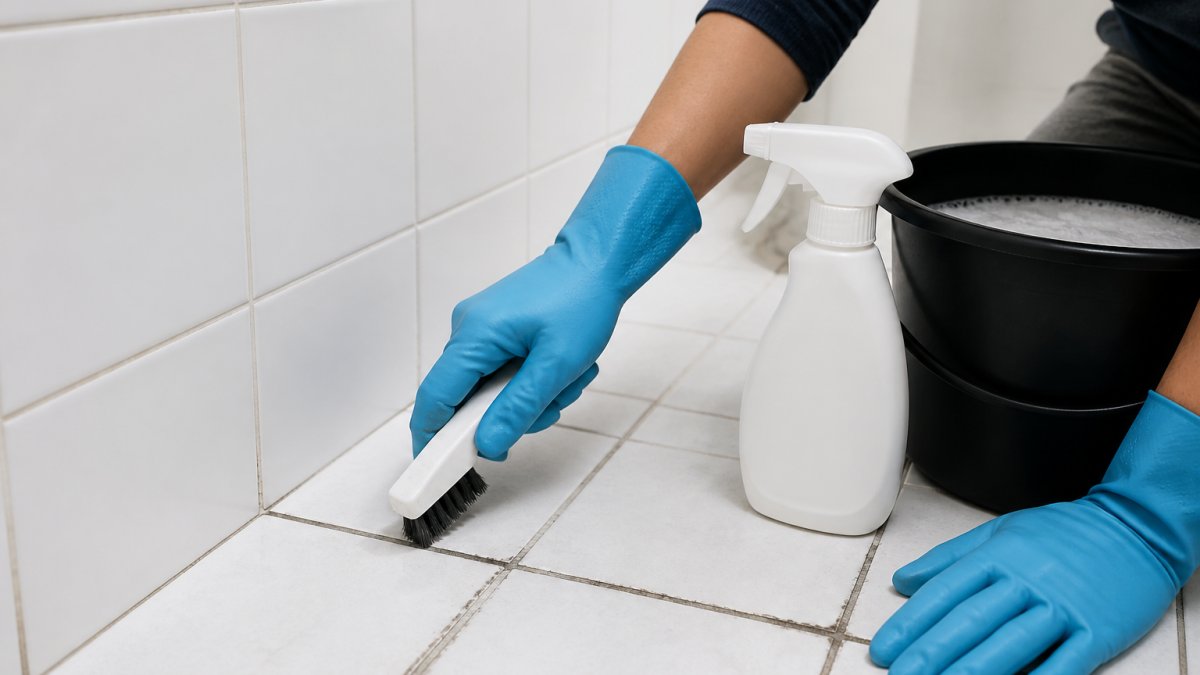
For the best results, follow a set order:
- Spray a small section with cleaner.
- Let it sit briefly.
- Scrub along the grout lines with firm strokes.
- Move to the next section.
Step 5: Rinse, Dry, and Check Your Work
Rinse the grout with clean water and dry it right away. Leftover cleaner can leave a film that attracts new dirt. A clean rinse also shows you which spots still need work.
Wipe the area with a damp sponge or cloth, then dry it with a clean towel. Check the grout lines in good light. If stains remain, repeat the scrub on those spots.
Let the area dry fully before you use the shower or tub again. Good airflow speeds this up.
How to Remove Stains from Grout
Stubborn stains need a targeted approach, not more scrubbing. For a deeper guide on removing soap scum from shower tile, see How to Remove Soap Scum From Shower Tile. Match the treatment to the stain type for the best result.
- Soap scum: baking soda paste left to sit, then scrubbed
- Rust: a paste of baking soda and water, applied and left briefly
- Grease: mild dish soap in warm water
- Mildew: a mildew-specific cleaner used with good ventilation
Mold and Mildew vs. Ordinary Staining
Mold and mildew are not the same as dirt. Mildew shows up as black or gray speckling that spreads in damp, warm spots. Ordinary staining is usually brown or gray and stays put.
Treat mildew with a mildew cleaner and improve airflow in the room. If mold keeps coming back, find the moisture source. Watch out: never mix cleaning products, and always ventilate the space.
How Often to Clean Bathroom Grout
Clean bathroom grout every one to two weeks for regular upkeep, and deep clean it every one to three months. High-traffic showers need more frequent attention than a guest bath.
A simple schedule keeps grout from staining in the first place:
- Weekly: quick spray and light scrub on shower lines
- Monthly: deeper scrub with baking soda paste
- Every few months: full deep clean and a check of the seal
A regular routine is the real key to grout that stays clean. To compare electric spin scrubber options for shower cleaning, see Best Electric Spin Scrubber For Shower.
Here is the cleaning schedule the article recommends for keeping bathroom grout from staining.
| Frequency | Task |
|---|---|
| Every one to two weeks | Regular upkeep cleaning |
| Every one to three months | Deep clean |
| Weekly | Quick spray and light scrub on shower lines |
| Monthly | Deeper scrub with baking soda paste |
| Every few months | Full deep clean and a check of the seal |
Frequently Asked Questions
What is the best brush to clean bathroom grout?
A stiff nylon brush with dense bristles and a compact head works best for most grout lines. Look for a brush narrow enough to fit between tiles without scratching the surface. For wide joints, a slightly larger brush covers more area; for narrow lines, a toothbrush-style head reaches into tight spots. Avoid metal bristles, which can damage grout and tile glaze. A cordless spin scrubber with interchangeable heads can speed up larger floors and walls.
How long should cleaner sit on grout before scrubbing?
Give the cleaner 5 to 10 minutes of dwell time before you scrub. This lets the solution break down grime and buildup so the brush does less work. For stubborn stains, reapply and let it sit another few minutes. Don't let cleaner dry on the grout, because dried residue is harder to rinse. Work in small sections so the solution stays wet while you scrub.
Can you use a toothbrush to clean grout?
Yes, an old toothbrush works well for narrow grout lines, corners, and small touch-ups. Its compact head reaches spots a larger brush misses. However, a toothbrush takes longer on big areas like shower floors and walls. For full bathroom grout cleaning, use a firm-bristled grout brush or a spin scrubber, and keep the toothbrush for detail work around fixtures and edges.
How often should you clean bathroom grout?
Clean bathroom grout every one to two weeks with a brush and mild cleaner to keep dirt and buildup from settling in. Deep clean monthly, or sooner in high-traffic showers. Wipe down walls after showers and fix leaks promptly to slow staining. If you notice mildew returning quickly, increase cleaning frequency and improve ventilation in the bathroom.
Grout that stays clean comes down to the right brush, a safe cleaner, and a routine you actually keep. Nuksy makes that easier with practical cleaning tools built for everyday jobs: a cordless spin scrubber with eight brush heads for larger areas, and a refillable soap brush for targeted scrubbing. Both come with free U.S. shipping on every order and easy returns. Get started with Nuksy and build a grout routine that keeps your bathroom looking fresh.
